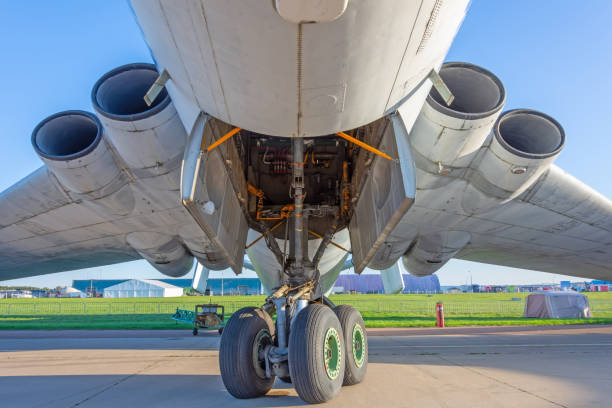
Aircraft hydraulic brake systems are vital to the safety and operability of any aircraft, from light general aviation planes to larger commercial and turbine-powered aircraft. Routine maintenance of these systems ensures not only compliance with regulatory requirements but also reduces the risk of brake failure during critical phases of flight such as taxi, landing, or emergency stops.
This step-by-step guide covers the essential procedures for performing aircraft hydraulic brake maintenance, including inspection, servicing, and bleeding. For detailed bleeding instructions, refer to this complete walkthrough on how to bleed aircraft brakes.
Understanding the Hydraulic Brake System
Aircraft hydraulic brakes operate by converting pilot pedal pressure into hydraulic force, which is then transferred through brake lines filled with specialized fluid to the brake calipers. The calipers clamp onto the rotor, generating friction and slowing the aircraft.
Key components of a typical aircraft hydraulic brake system include:
- Master cylinders (connected to the rudder pedals)
- Brake lines and fittings
- Calipers and pistons
- Rotors or discs
- Brake fluid reservoir
- Bleed valves
Regular maintenance ensures all these components work harmoniously to deliver consistent, firm brake response under all operational conditions.
Step 1: Gather Required Tools and Materials
Before starting maintenance, ensure you have the necessary tools and safety gear:
- Safety goggles and gloves
- Wrenches (appropriate size for bleed valves)
- Brake fluid (MIL-H-5606, MIL-PRF-83282, or as specified in AMM)
- Brake cleaning solvent and rags
- Clear tubing and catch bottle (for manual bleeding)
- Pressure bleeder (optional)
- Inspection mirror and flashlight
Having the aircraft maintenance manual (AMM) on hand is crucial. Each aircraft may have model-specific procedures or torque requirements.
Step 2: Perform a Visual Inspection
Inspect all visible components of the brake system for wear, leaks, and corrosion. Focus areas include:
- Brake lines: Look for cracked or brittle hoses.
- Fittings and connections: Ensure there’s no fluid seepage.
- Calipers and pistons: Check for leakage around seals.
- Rotors: Inspect for deep scoring or discoloration from overheating.
- Pads: Ensure even wear and sufficient thickness.
Document any abnormalities and replace worn components as needed.
Step 3: Check and Top Off Brake Fluid
Using the reservoir sight glass or opening the cap (if allowed), check brake fluid levels. Low fluid may signal a leak or evaporation over time.
- Clean around the reservoir cap to avoid contamination.
- Add the correct type of brake fluid slowly to prevent introducing air.
- Never mix different types of fluid unless explicitly allowed by the manufacturer.
Refer to the FAA Advisory Circular AC 43.13-1B for fluid handling best practices.
Step 4: Clean Brake Assemblies
Brake dust, oil, and debris can build up on calipers, discs, and fittings, leading to uneven braking or corrosion. Clean all components with approved brake cleaner and lint-free cloths. Avoid blowing dust with compressed air, as some brake materials can be hazardous if airborne.
If rotors or discs show surface rust or glazing, use fine emery cloth as permitted by the AMM. Avoid aggressive sanding or grinding.
Step 5: Inspect and Service Calipers and Pads
Remove the wheel (if needed) to access calipers and pads.
- Pads: Replace if below minimum thickness or if wear is uneven.
- Calipers: Check piston operation and inspect dust boots.
- Torque fittings: Use manufacturer-specified torque settings.
If seals are leaking, disassemble the caliper and replace with OEM-approved seal kits.
Step 6: Bleed the Brake System
Bleeding the brakes removes air that compromises hydraulic pressure. This is a critical part of brake maintenance and must be performed correctly.
There are two common methods:
Manual Bleeding:
- Involves one technician pumping the brakes while another opens and closes the bleed valve.
- Monitor the fluid exiting into a clear tube until all air bubbles disappear.
Pressure Bleeding:
- Uses a pressure pump to push fluid from the bottom up.
- Quicker and more effective, especially for dual systems.
For a full walkthrough, see DK Turbines’ guide on how to bleed aircraft brakes.
Step 7: Test Brake Performance
Once bleeding is complete:
- Apply and hold brake pressure from the cockpit. Pedals should feel firm and hold pressure.
- Check for leaks at all bleed points and fittings.
- If brakes feel soft or fade under pressure, recheck for air in the system or possible leaks.
It’s a best practice to conduct a short ground taxi test if possible, checking for responsiveness and alignment.
Step 8: Document the Maintenance
In accordance with FAA Part 43, all maintenance actions must be properly documented:
- Date and description of service
- Type and quantity of fluid used
- Serial numbers of replaced components
- Signature and certificate number of the mechanic
Good documentation helps maintain airworthiness and improves traceability in the event of future issues.
Preventive Maintenance Tips
To extend the life of your hydraulic brake system and avoid costly repairs:
- Inspect fluid levels regularly, especially in hot or humid climates
- Bleed the brakes during annual inspections or after long storage periods
- Use only approved brake fluids and store them in sealed containers
- Avoid overfilling reservoirs, which can lead to expansion and leaks
As noted by the Aircraft Owners and Pilots Association (AOPA), even minor brake system maintenance can prevent major issues if addressed early.
Conclusion: Brake Maintenance is Flight Safety
Hydraulic brake maintenance is not just about operational smoothness—it’s a critical safety protocol. Whether you’re a certified A&P mechanic or an owner-operator conducting preventive inspections, understanding the step-by-step process ensures your aircraft remains compliant, responsive, and safe.
From inspection to cleaning and bleeding, every stage must be performed with care and precision. With the right tools, fluids, and procedural knowledge, you can keep your aircraft’s braking system in top condition—ensuring it performs exactly when you need it most.