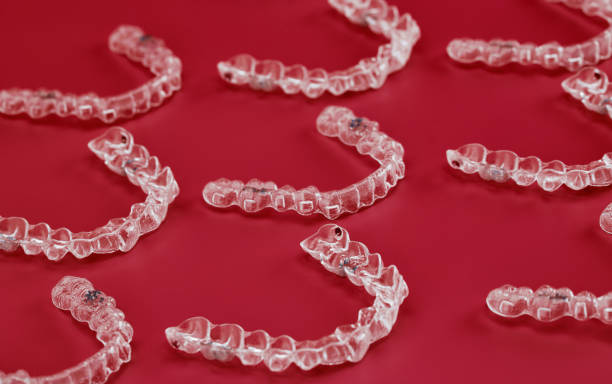
Clear aligners look simple, but their design depends on careful planning and sharp images of your teeth. You may only see a clear tray. Yet behind it stands a full digital record of your mouth. Advanced imaging lets your dentist see every curve, gap, and worn edge. This clear view supports a custom plan for each small tooth movement. It also helps protect existing work, such as fillings and dental crowns in Villa Rica, GA. With modern scans, you avoid messy impressions. You also reduce guesswork. Your dentist can show you how your teeth may shift over time. That picture can help you stay motivated when treatment feels slow. It can also reveal hidden problems before they cause pain. When you understand how aligners are designed, you can ask sharper questions and feel more in control of your care.
Why Imaging Matters Before You Start Aligners
Clear aligners move teeth in small steps. Each tray must fit your mouth today and guide your teeth toward the next position. Strong imaging keeps that process safe.
Your dentist uses imaging to:
- Check bone levels that hold teeth in place
- Find decay, cracks, and worn spots
- See roots and nerves that need protection
The National Institute of Dental and Craniofacial Research explains that hidden decay can grow without clear signs. Early pictures help your dentist treat problems before teeth start to move.
Types of Imaging Used for Clear Aligners
You may go through three main steps before aligner design starts. Each step uses a different tool.
1. Digital Scan of Your Teeth
The intraoral scanner takes many small images and builds a 3D model of your teeth and gums. You breathe and swallow as usual. The scan tip moves over each surface.
This scan helps your dentist:
- Measure tooth size and shape
- Record current bite
- Spot crowded or twisted teeth
2. Dental X Rays
Aligner planning needs a view below the surface. X-rays show roots, bone, and tooth positions that you cannot see in the mirror.
Common images include:
- Panoramic X-ray that shows both jaws in one picture
- Small bitewing X-rays that focus on decay between teeth
- Periapical X-rays that show full roots
The U.S. Food and Drug Administration gives clear guidance on safe dental X-ray use. That guidance helps your dentist choose the lowest dose that still gives a clear image.
3. Photos of Your Face and Smile
Your dentist may take photos of your smile from the front and side. These images help map how teeth support your lips and cheeks. They also help match tooth changes to your face.
From Images to a Digital Treatment Plan
Once your dentist gathers scans, X-rays, and photos, the real design work begins. Each piece of data feeds into planning software that builds a step-by-step path for your teeth.
The process often follows three stages.
Stage 1: Current Mouth Map
The software lines up your scan with your X-rays. It builds a model of your teeth, roots, and bone. Your dentist reviews this model and marks areas that need care before movement starts.
Stage 2: Target End Result
You and your dentist talk about goals. You may want straighter front teeth, better chewing, or easier cleaning. Your dentist sets a realistic end result based on your bone, gums, and tooth health.
Stage 3: Step Plan for Each Aligner Tray
The software breaks the movement into small steps. Each step becomes one tray. Your dentist checks each stage and may adjust tooth movement to reduce strain.
Sample Data Used in Aligner Design
| Data from Imaging | Why It Matters for Aligners | Possible Impact on Your Plan |
|---|---|---|
| Bone height around each tooth | Shows how much support each tooth has | May limit how far or how fast teeth move |
| Root length and angle | Reveals tooth stability | May change which teeth move first |
| Existing fillings and crowns | Shows spots that need protection | May adjust tray shape to reduce pressure |
| Crowding or gaps | Defines starting problem | Sets number of trays and treatment time |
| Bite contact points | Shows how teeth meet when you chew | Guides changes that ease jaw strain |
How Imaging Protects Existing Dental Work
If you have crowns, bridges, or fillings, imaging helps your dentist shield that work. Clear pictures show where each piece sits and how thick the surrounding tooth structure is.
Your dentist may:
- Adjust tray edges so they do not press on crown margins
- Limit movement of teeth that hold a bridge
- Check bite after each stage to prevent cracks or chips
Careful planning reduces the risk of damage. It also supports a longer life for past dental work.
What You Experience During the Design Process
You may feel nervous about scans or X-rays. It helps to know what to expect.
During your visit, you can expect three simple steps.
- You sit in the chair while the scanner moves over your teeth. The tip may rest on each surface for a short time.
- You bite on small tabs or rest your chin for X-rays. The machine may rotate around your head.
- Your dentist shows you the digital model on a screen and walks through the plan.
You can ask:
- How many trays the plan includes
- Which teeth will move the most
- How imaging will track progress over time
Using Imaging to Track Progress
Your first scans do not sit on a shelf. Your dentist can compare new images to the starting record at check visits. That comparison shows if teeth follow the plan or if trays need changes.
Follow up imaging may:
- Confirm that roots stay in healthy bone
- Show if a tooth lags behind and needs extra trays
- Catch early wear or small cracks before they spread
How to Talk With Your Dentist About Imaging
You deserve clear answers about every scan and X-ray. Strong questions include three simple points.
- Purpose. Ask what each image will show that others cannot.
- Safety. Ask how your dentist keeps exposure as low as possible.
- Impact. Ask how the image will change your aligner design or timeline.
Clear imaging supports a safer, more precise aligner plan. When you understand how each picture guides each tray, you stay more engaged. That focus often leads to better daily wear and stronger long-term results for your smile and your health.